Windows 11, which is an attempt by Microsoft so that it is not less competitive than MacOS, has turned out to be quite successful.
Even though at first it was feared that it would cause more problems than Windows 10 which was considered perfect, it turns out that now many people are satisfied with Windows 11.
Moreover, its appearance is fresh, clean, and simple. Not to mention the various updates that Windows 11 has have many users interested.

Unfortunately, the minimum specifications required by Microsoft are quite high. This causes several problems for people who want to update the OS, one of which is the problem of Windows 11 being incompatible.
But don’t worry, let’s try to solve the problem!
1. Ensure your device’s compatibility

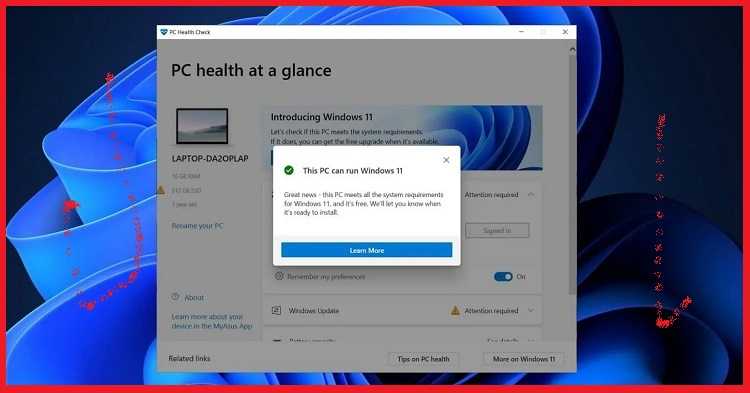
Actually, since it was first launched on June 24, 2021, Microsoft has prepared several tools that you can use to check Windows 11 compatibility. One of them is PC Health Check for Windows 10.
Some of the possibilities that you can get are:
- This PC can run Windows 11, which means you can directly download and update your operating system.
- This PC can’t run Windows 11, which means that your device’s system requirements cannot run Windows 11.
Now for those of you who get the second error message, you don’t need to worry. If your device’s specifications meet it, it means that there are several things that need to be fixed about your device’s system.
Conversely, if the device specifications are not met, we don’t think you need to continue reading the following tips from us.
2. Activate TPM 2.0

One of the most common problems found by new users is TPM 2.0, which doesn’t yet have devices. TPM itself is a microcontroller that functions to store important and encrypted data.
In Windows 11, you will store a lot of important data such as Windows Hello, Windows PIN, passwords, and so on. Of course, TPM 2.0 is very necessary to maintain the security of the data you have.
The way to activate TPM 2.0 is as follows:
- Open Run by pressing Windows + R.
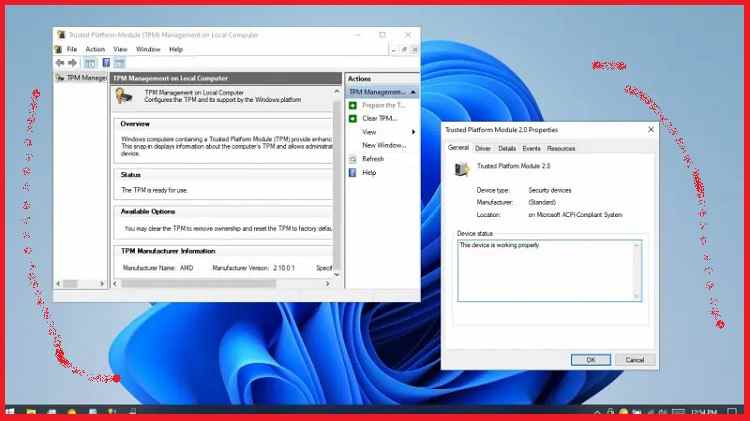
- Type tpm.msc
- See the Status tab on the TPM menu.
- If it says The TPM is ready for use, it means that the TPM is active.
- If it says Compatible TPM cannot be found, it means the TPM has not been activated or is disabled in the BIOS settings. If so, continue to the next step
- Restart the device, and enter the BIOS menu.
- Klik Security Tab > TPM Device > Select Available.
- Restart your device.
If after carrying out the steps above you still cannot update the system, please try the next step.
Read Also:
3. Activate Secure Boot

Apart from the TPM 2.0 module, one of the reasons many people can’t update their operating system to Windows 11 is this. Where many devices have not activated their Secure Boot.
Even though Secure Boot itself is one of the BIOS settings that allows system installation to run smoothly and error-free. The following is how to activate Secure Boot.
- Press Windows + S > type msinfo32 > Click.
- Click System Summary> see the Secure Boot State tab on the right side.
- If it says Unsupported, it means that your system settings do not support Secure Boot.
- If it says On, it means the secure boot is enabled.
- If it says Off, it means the secure boot is not enabled. If so, you can continue to the following steps.
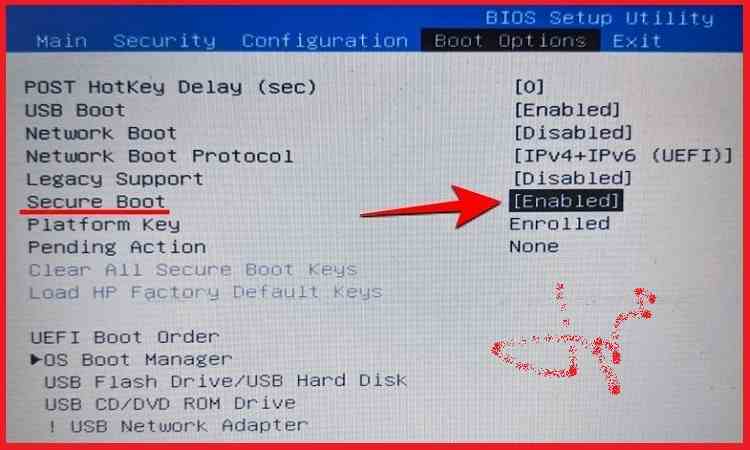
- Restart the device > enter into the BIOS menu.
- Cari menu Boot > select Advanced Mode > select Secure Boot > Enabled.
- Save > Exit.
- Restart your device.
- Repeat steps 1 and 2 to ensure the secure boot is activated.
If using this method you still can’t update the operating system, then you can try the next step.
3. Happy File appraiserres.dll
When downloading Windows 11, there is a possibility that the system will fail to send files completely. It is possible that the files sent are damaged, lost or corrupted due to existing network problems.
Well, one of the files that is often damaged is appraiserres.dll , which fortunately you can fix by deleting it. As of January 2023, it is certain that deleting this file will fix a similar problem.
The method is as follows.
- Open WinRar > right-click on Windows 11 ISO File.
- Click Extract Files > select the destination folder > click OK.
- Open the folder where you extracted it > look for the Sources folder > and click Sources.
- Look for the appraiserres.dll file in the folder > Right Click > Select Delete.
- Run Setup.exe again.
Before updating on September 2023, you need to replace this file so that the installation process can run as it should. Fortunately, now you can just delete the file, and Windows 11 can run as it should.
You don’t need to worry that this method will prevent Windows 11 from functioning properly. However, if you still can’t update Windows 11 using this method, we suggest you try the next method.
4. Make sure the device is qualified
If you have tried several of the steps above but have not been able to update Windows 11, then you must ensure that the device you own is capable of meeting Microsoft’s minimum specifications.
Storage Capacity
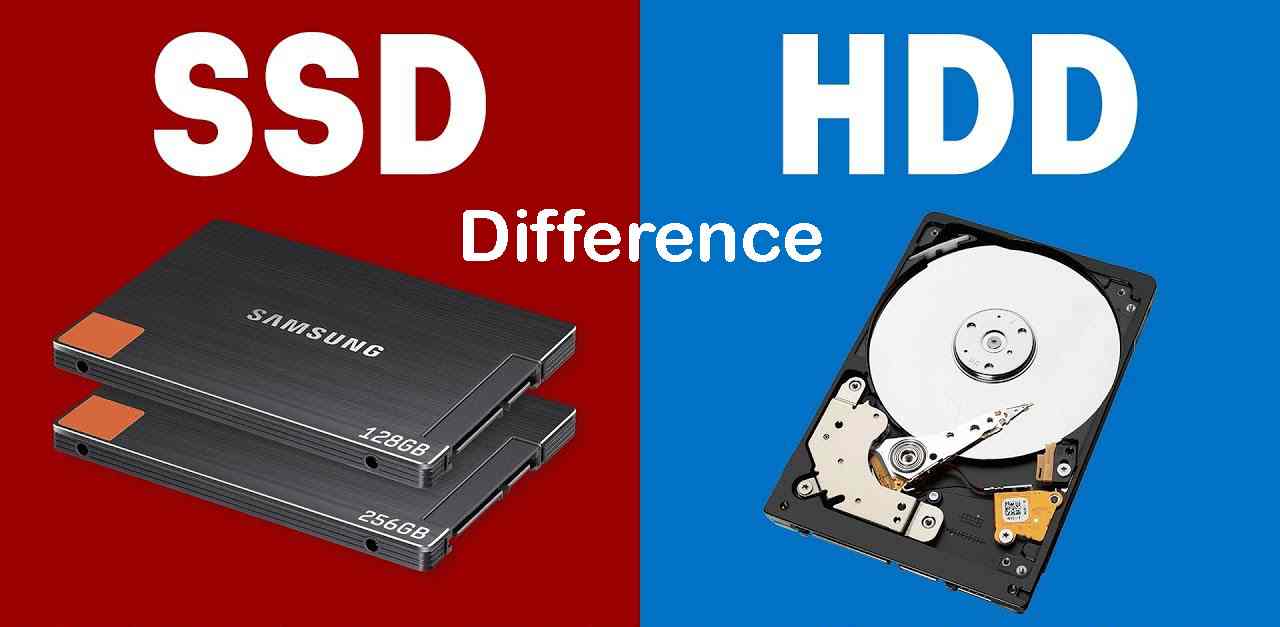
Windows 11 requires at least 20 GB of capacity to be installed on your device. Of course, if your storage capacity is equal to or less than 20 GB, then you will not be able to install Windows 11.
If so, just do a backup, move all important data to an external hard disk, and then delete the data that is still on your device. If so, you can try again to install Windows 11.
RAM
Apart from memory or storage capacity, one of the reasons why the device has not been able to install Windows 11 is that the RAM that is owned is still inadequate. Even though Microsoft itself requires you to have at least 4 GB of RAM on the device.
If so, of course, there is no other solution besides increasing the RAM capacity you have. After all, the current price of RAM on the market is much cheaper than the previous few years. So it’s actually not a big problem.
Processor
Another problem that you can find is that the processor is still not compatible with Windows 11. To check this, you can follow these steps.
- Press Ctrl + Alt + Del > Click Performance.
- See CPU section.
- Note the type and series of CPU you are using.
- Go to the following page for those of you who use Intel and the following for those of you who use AMD.
- Make sure the CPU you have is compatible.
If it is not compatible, we sincerely recommend that you continue using Windows 10. Apart from that, if you use a PC, of course, you can replace the CPU you have so that it is compatible.
Of course, you can’t share how to replace the CPU (or RAM) here. You can see the guide on YouTube, or you can even just take your device to the nearest laptop and PC service center.


